Upload Your First Media in VIDIZMO
The upload feature in VIDIZMO lets you add various types of files to your Portal's library. These types include videos, images, audio files, documents, SCORM packages, and more. In an EnterpriseTube (or EVCM) Portal, uploaded files are often called media.
What you can upload depends on your product package and Portal settings. If you have administrative access (for example, as a member of the Portal Manager group), you can configure these settings.
After an upload finishes, VIDIZMO starts processing the file by triggering a workflow. The workflow activities or actions during upload also depend on your Portal's configuration.
The most common activity is transcoding, which is enabled by default on all VIDIZMO Portals. Transcoding creates optimized renditions so your media plays smoothly across devices and bandwidths and supports formats that aren't natively supported, such as .mov
This article explains how to upload content to your VIDIZMO Portal.
Prerequisites
To upload content to your Portal, you need the required feature permissions. In VIDIZMO, feature permissions are granted through groups. Ensure you belong to a group that provides one of the following:
- Upload and manage my content: Lets you upload and manage your items in My Library (your private library). Commonly included in the Contributor group.
- Upload and manage all content: Lets you upload and manage all items across the Portal and access Media Manager, in addition to My Library. Commonly included in administrative groups such as Content Manager.
Upload Media
Follow these steps to upload media to your EnterpriseTube Portal:
- Click the Add Media button (bottom-right) to open the upload page.
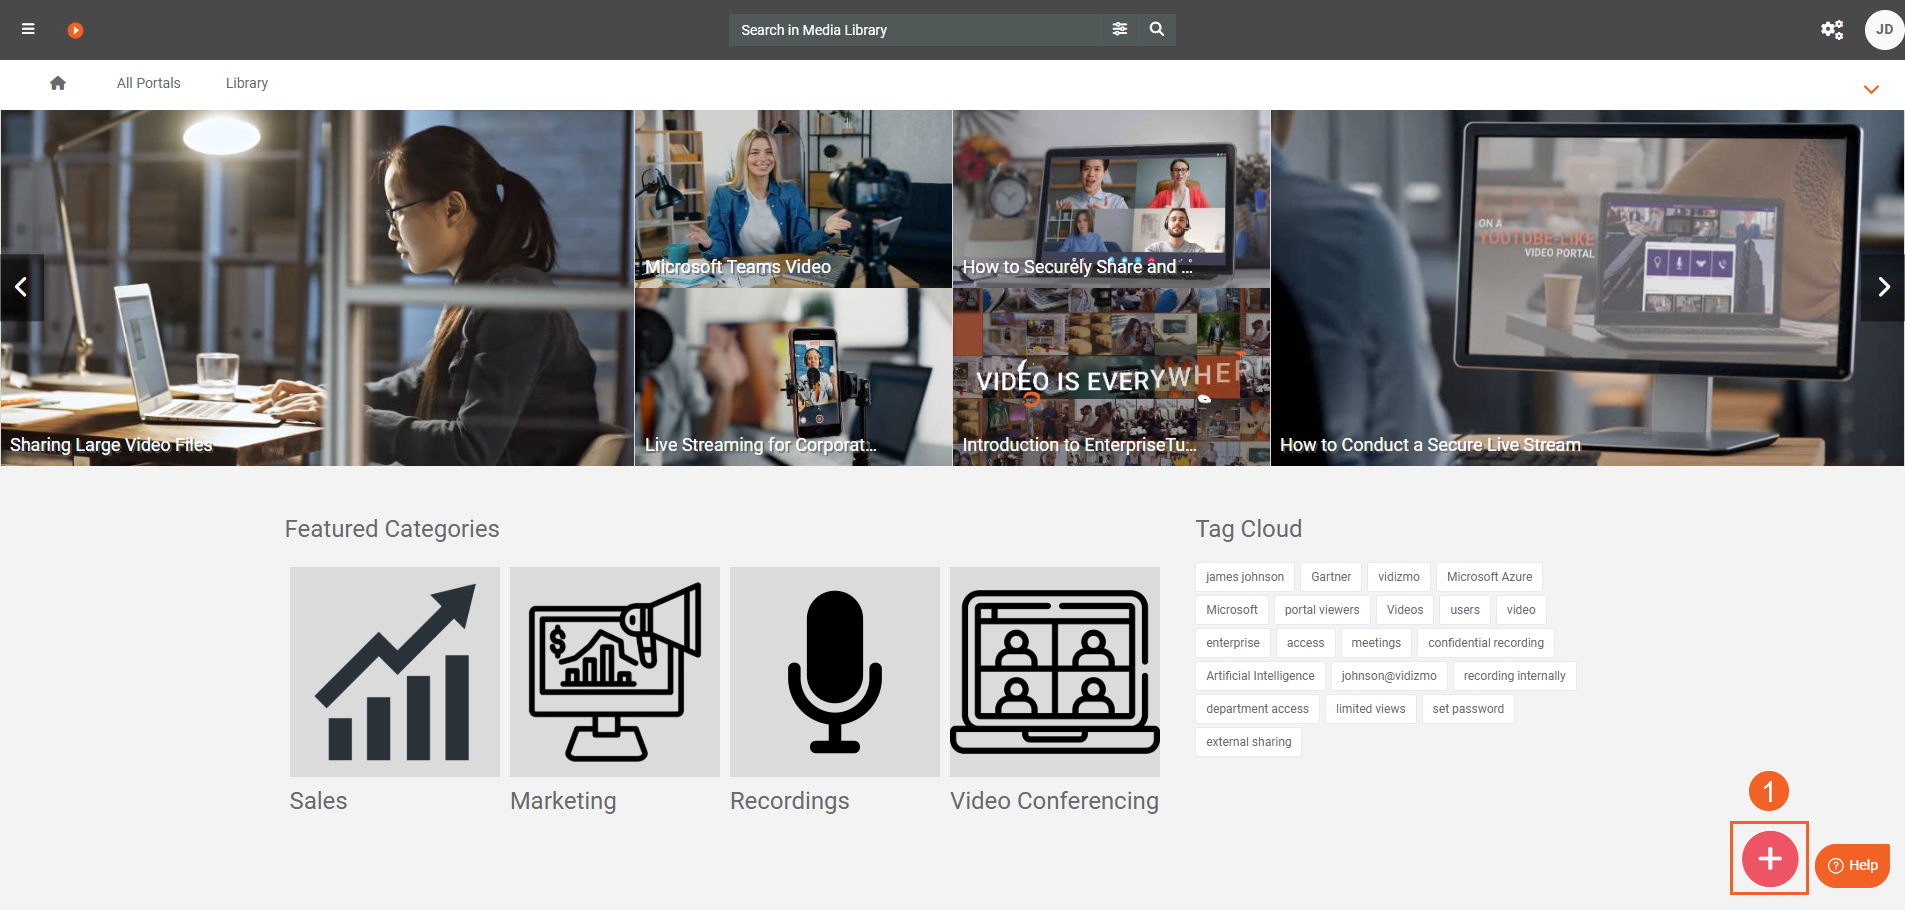
- Select Upload Media

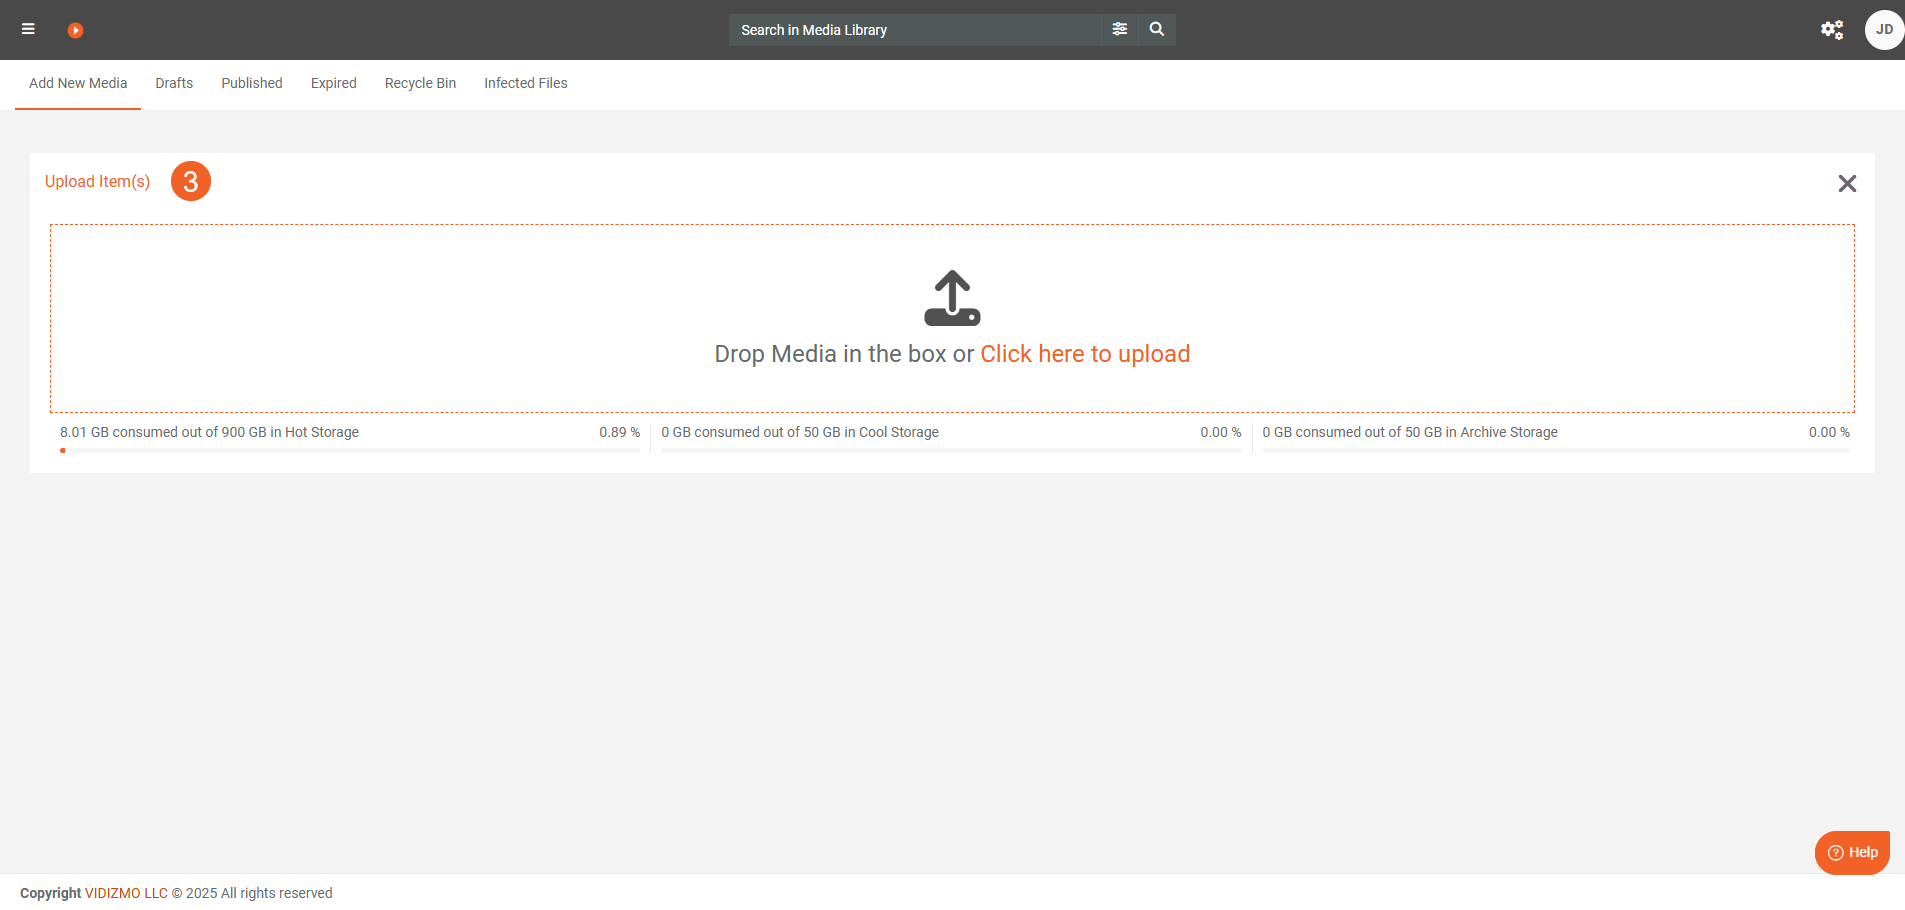
- Drag one or more files into the upload area, or select Click here to upload and choose your files.
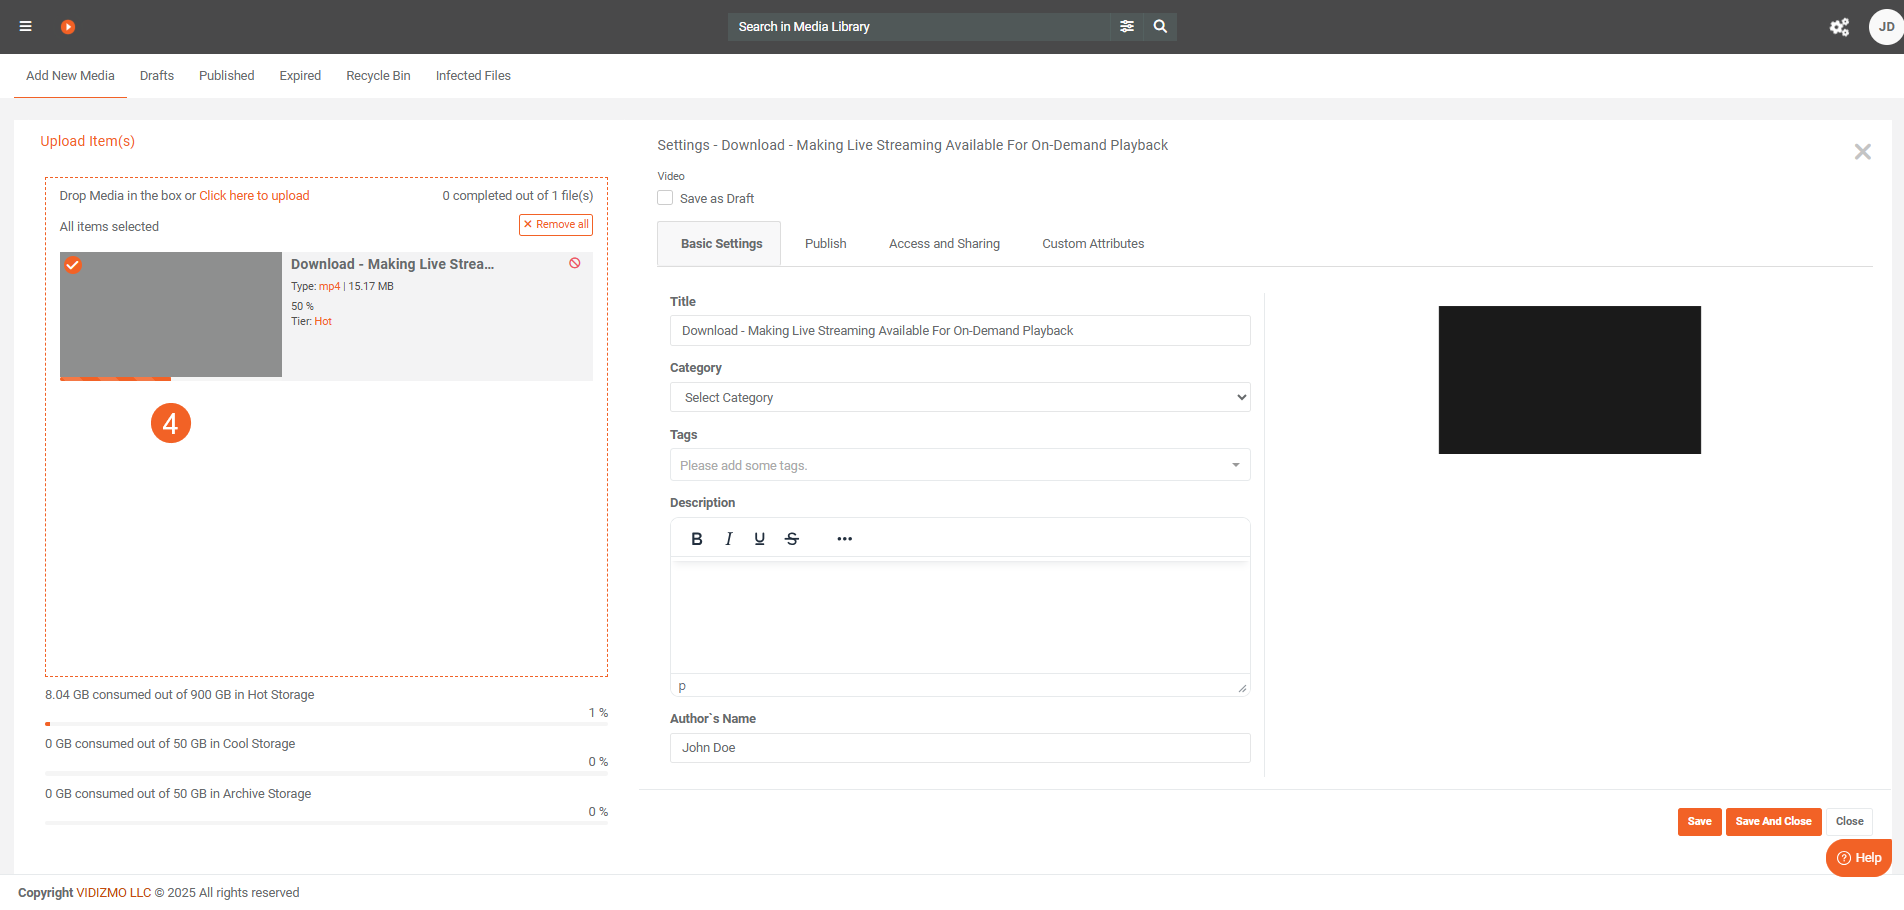
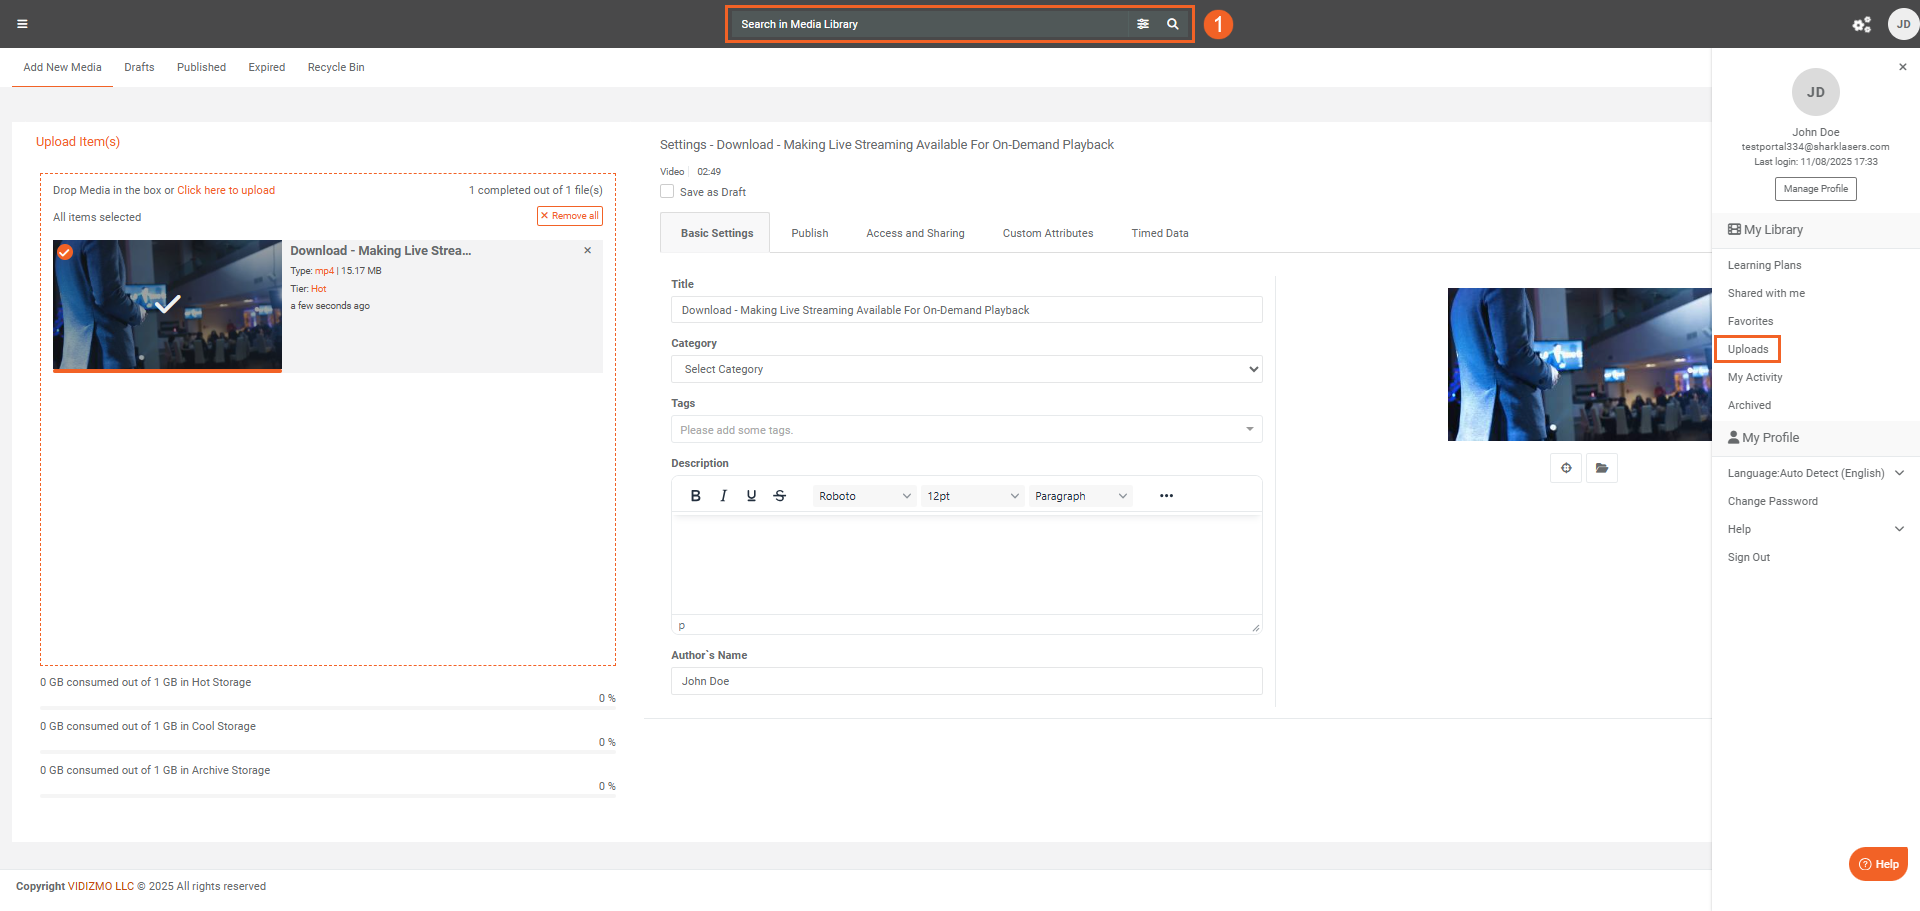
- As the upload starts, the settings interface opens. Use it to monitor upload progress and configure settings for your file. The progress indicator appears on the left—ensure it reaches 100% for a successful upload
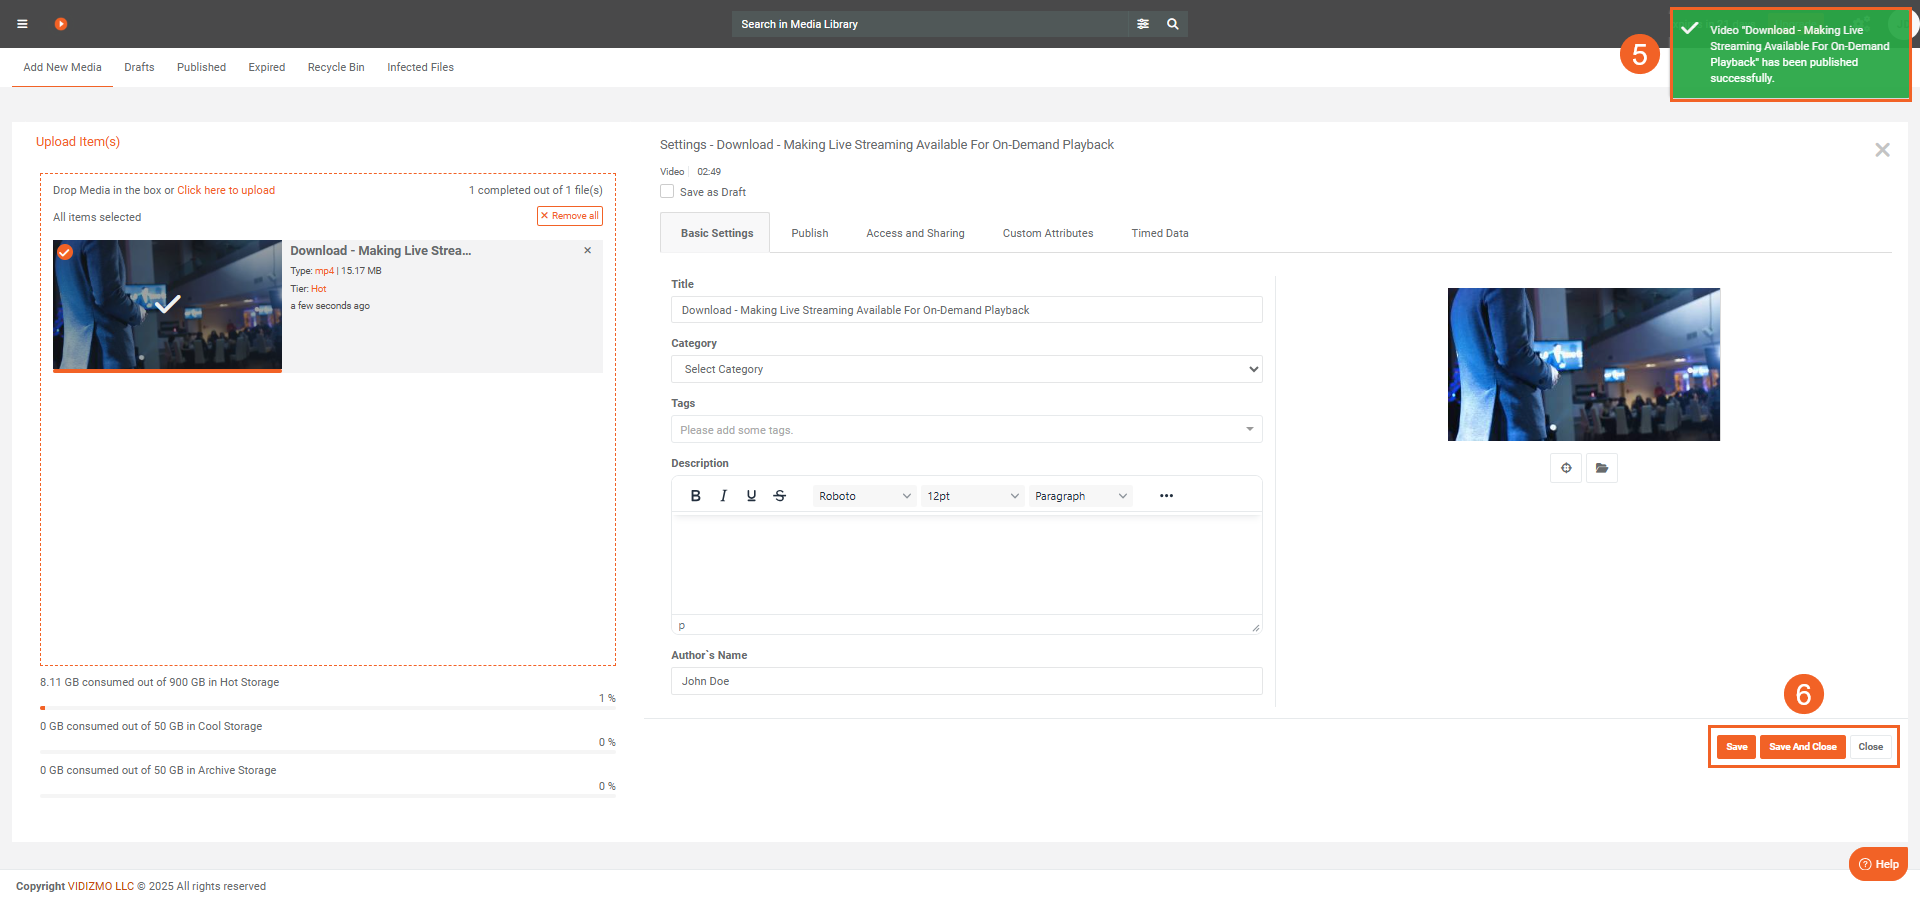
- When the upload is complete, VIDIZMO displays a notification indicating that the media has been published, drafted, or sent for moderation. The message depends on your Portal settings.
- Next, you can either: i. Select Close to exit without changing any settings. ii. Select Save & Close to save your settings and return to the library. iii. Continue editing the settings. Use the Save button to save changes while keeping the interface open.
Configure Media Settings during Upload
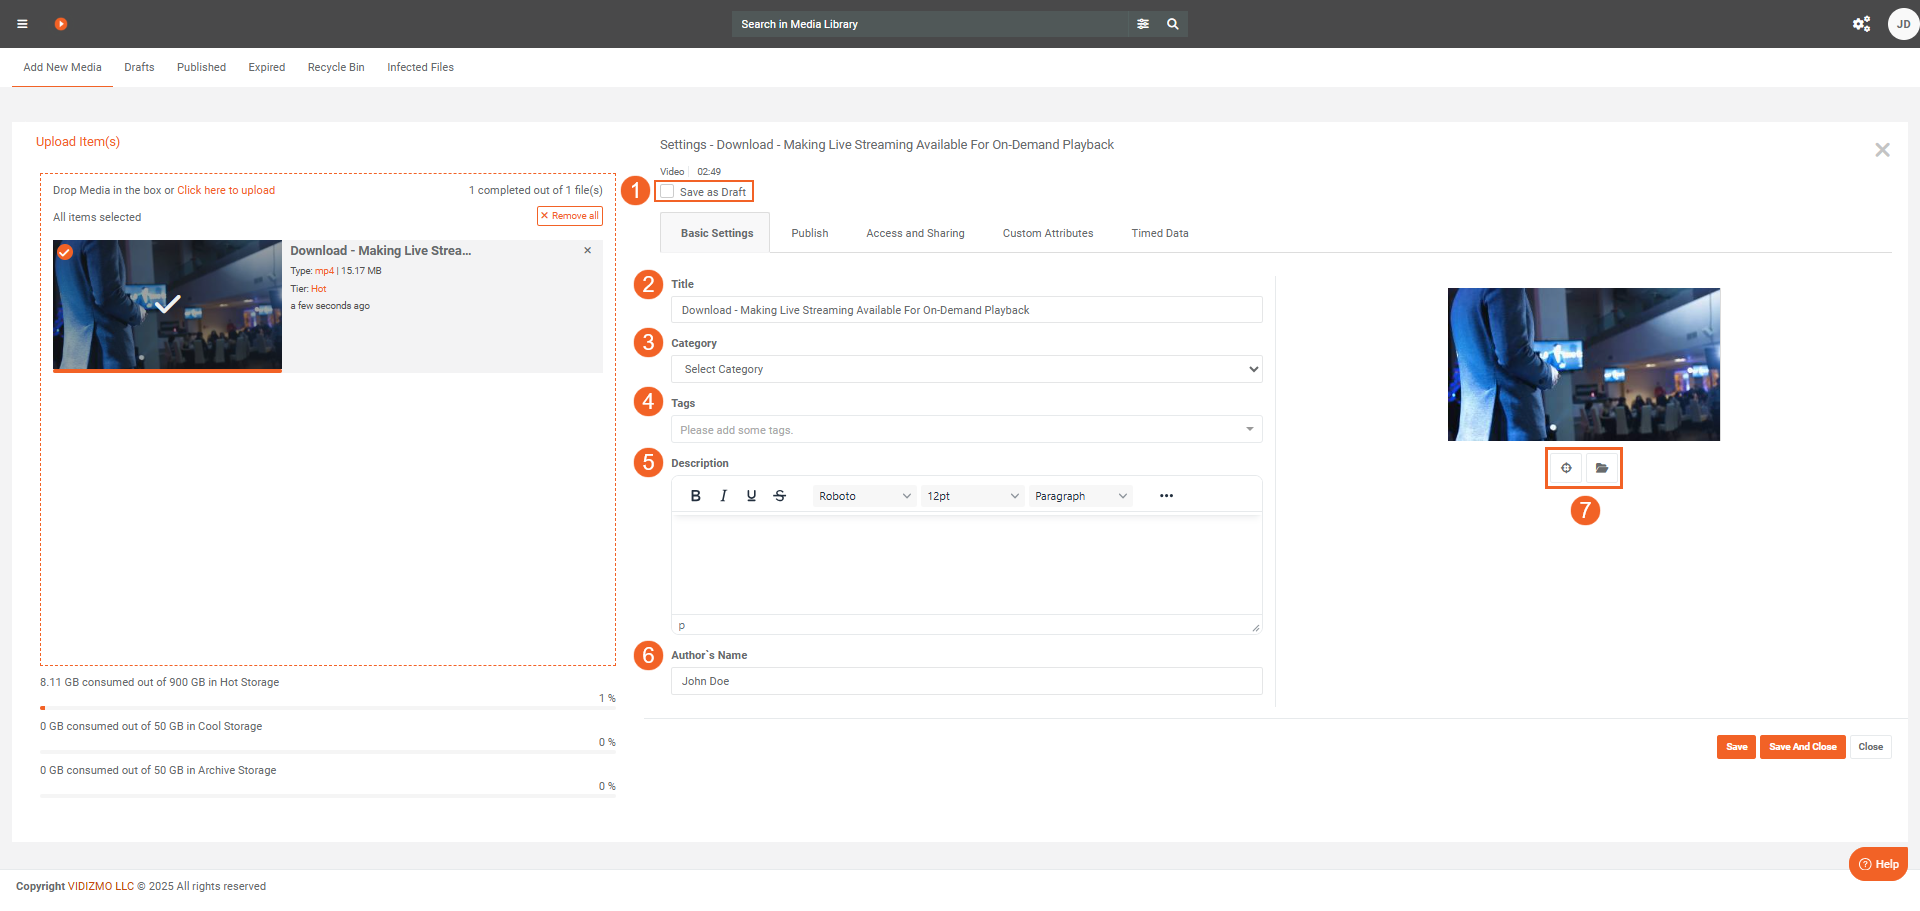
A. Basic settings
- Save as draft: Saves the media to the Draft tab. Drafts don't appear in the Portal library until published. Users with appropriate permissions (for example, those part of the Content Manager group) can publish drafts
- Title: Enter a clear, searchable title. The field is prefilled with the file name—you can change it.
- Category: Select a category for the media. The list shows categories created on your Portal.
- Tags: Add or create tags to improve search and discovery.
- Description: Provide a description. You can format text in the editor and use HTML if needed.
- Author: Update the author name if required. By default, this is your username.
- Thumbnail: Capture or upload a thumbnail for your video. See How To Capture And Upload Media Thumbnail. for more
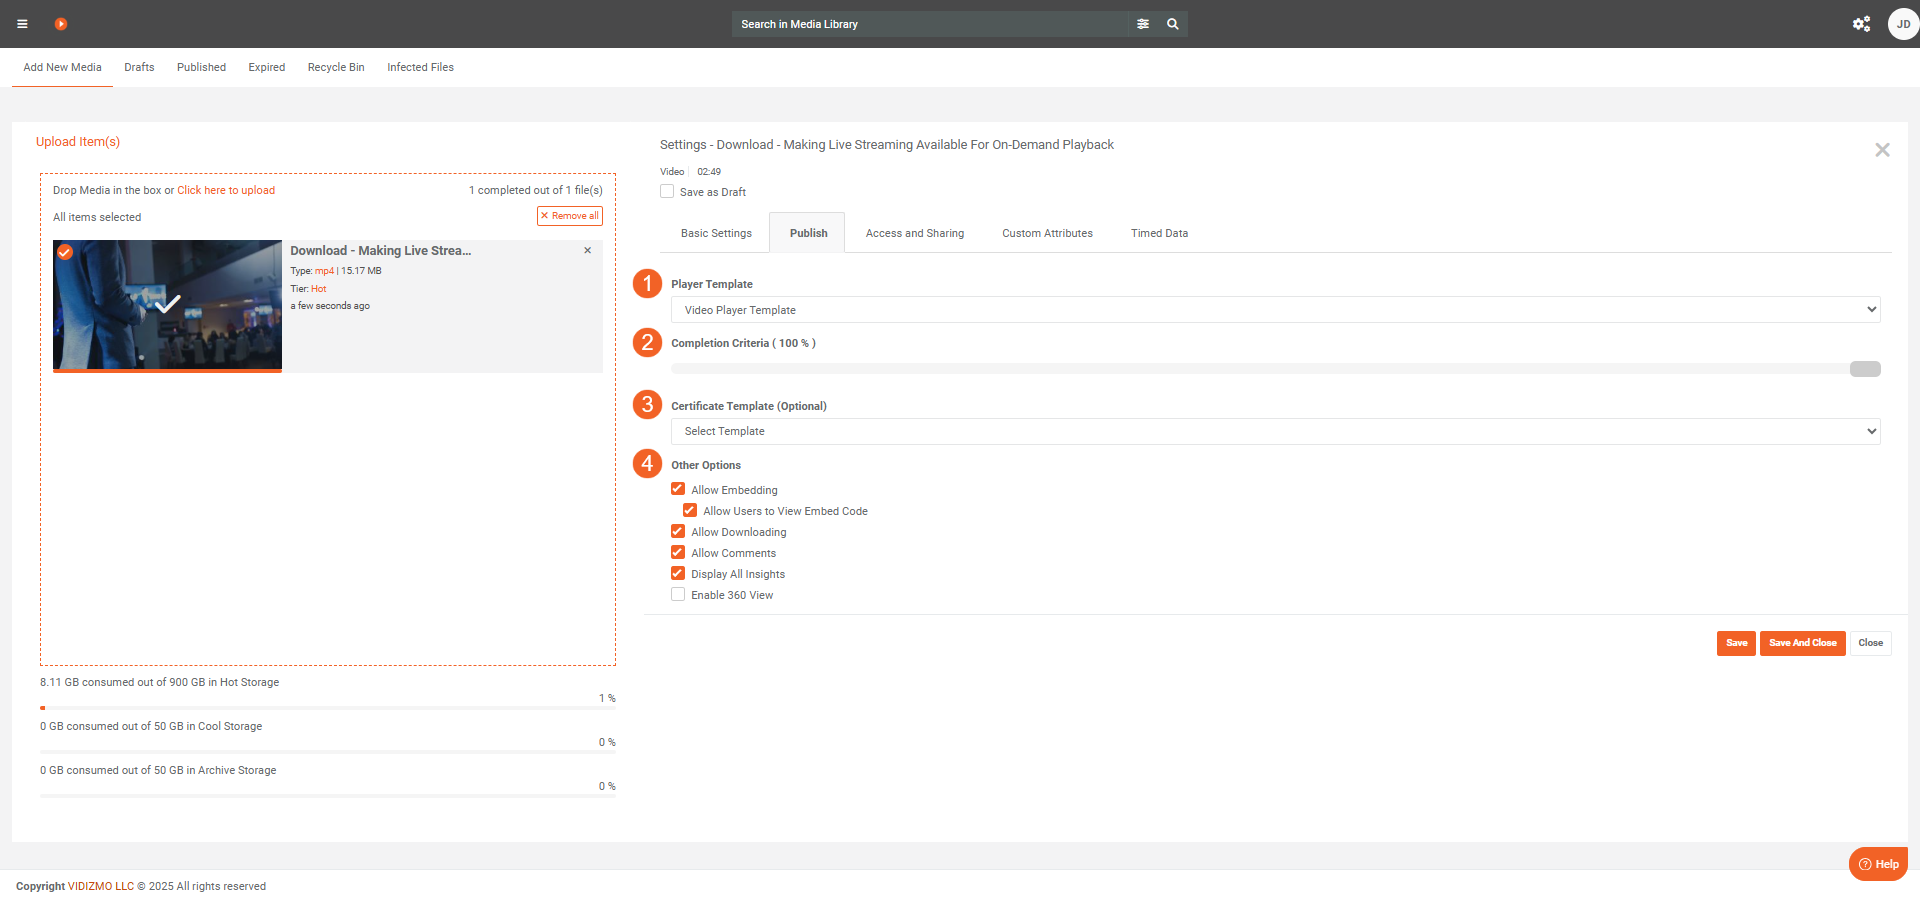
B. Publish
Use Publish settings to control how the media plays, what counts as a completion, and whether viewers can download, comment, or embed it
- Player template: Choose a player template for playback. VIDIZMO provides default player templates, and you can also create and use custom templates in your Portal. See How to Add, Edit or Delete a Player Template.
- Completion criteria: Set the percentage of the media a viewer must watch (or listen to) for VIDIZMO to count a completion in analytics.
- Example: If you set Completion criteria to 70%, viewers must complete at least 70% of the media for a completion to be recorded.
- Completions drive analytics and can also be used to award certificates (see next step).
-
Certificate Template: Select a certificate template to award a certificate when a viewer meets the Completion criteria. VIDIZMO includes default certificate templates; you can also create custom templates in your Portal and select them here. This setting is optional. See How to View and Add Certificate Templates in VIDIZMO
-
Other Options: Configure additional options for the media:
-
Allow embedding: Turn on to allow the media to be embedded on other sites. If you turn this off, existing embeds will no longer work.
-
Generate Code Create the embed code that viewers can use to embed the media with
<div>or<iframe>tags on external sites. -
Allow downloading: Let viewers download the media from the browser. If the media is transcoded, viewers can also download available renditions.
-
Allow comments: Turn on to enable comments on the playback page.
-
Display All Insights: Show all insights generated during processing on the playback page, such as transcriptions, geospatial map, and AI insights like object detections.
-
Enable 360° playback: Turn on to allow 360° viewing. Use only for media recorded in 360°.
Note: Some options vary by content type. For example, documents and images don't use completion criteria or certificate templates..
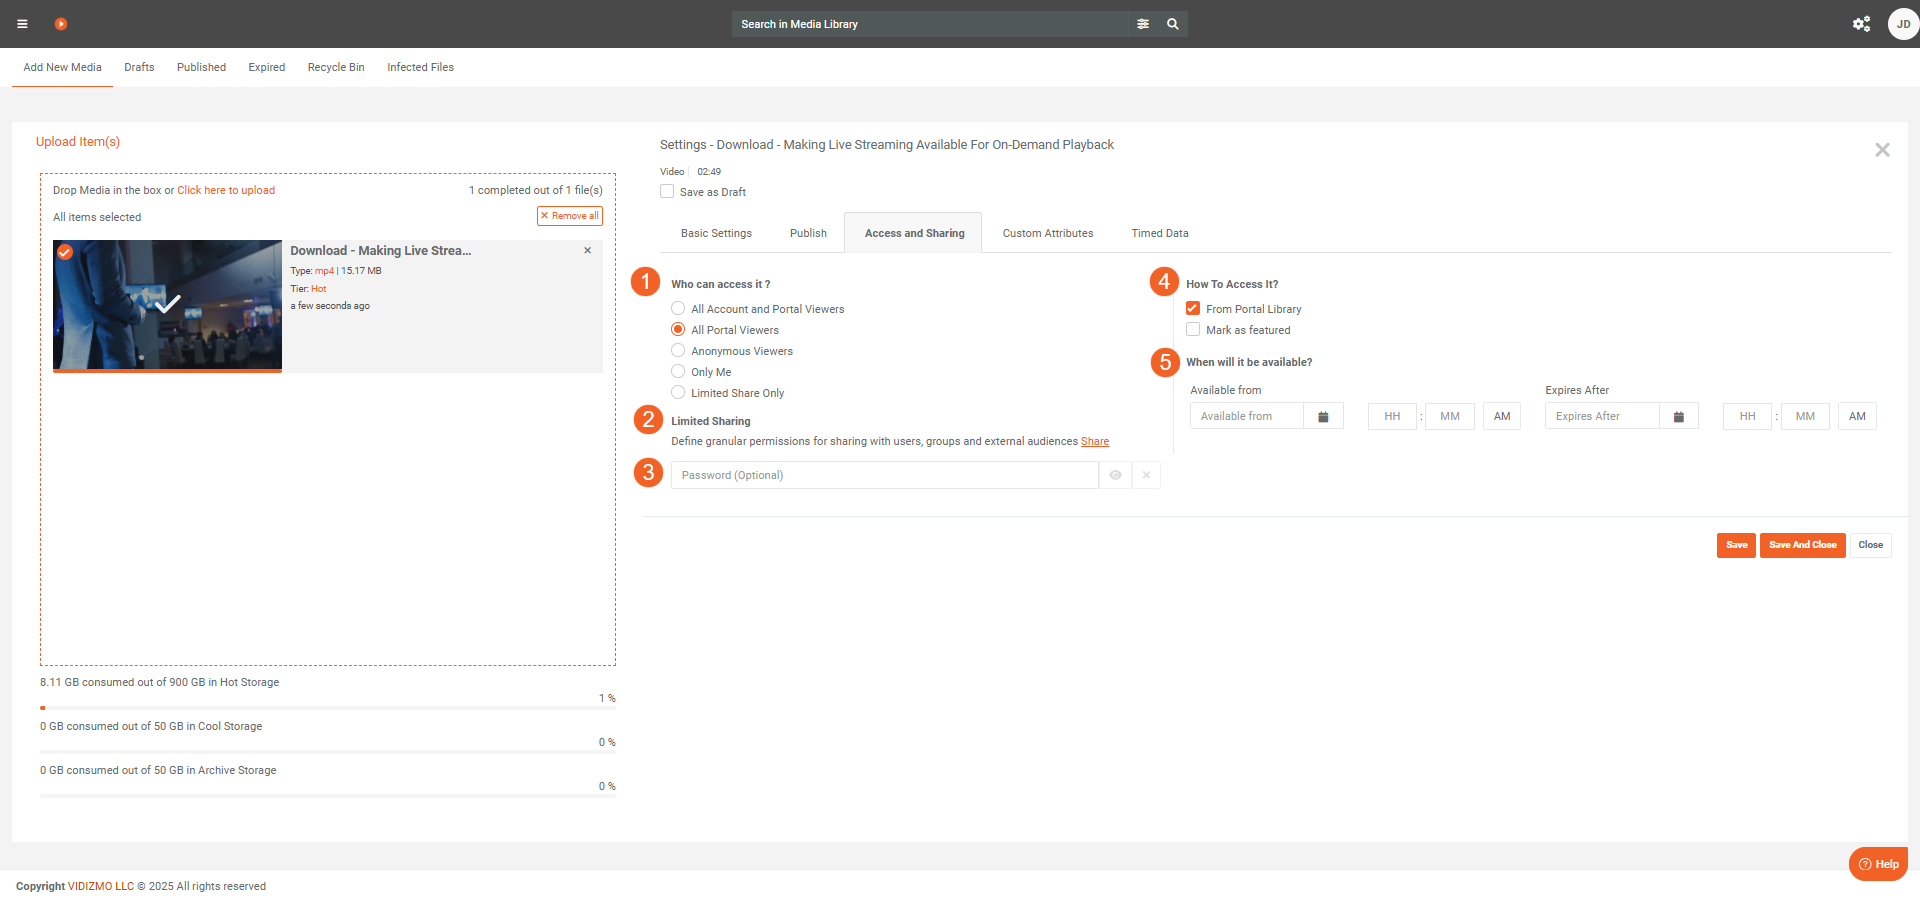
C. Access and Sharing
Control who can view the media, where it appears, and when it's available.
-
Who can access it? Choose who can view the media: - All Account and Portal Viewers: Everyone in the account, including this Portal and its sub-portals. - All Portal Viewers: Viewers of this Portal only. - Anonymous Viewers: Anyone with the link (accessible to external or public users). - Only Me: Private to you and available only in My library (removed from the Portal library). - Limited Share Only: Share with selected users and groups only.
-
Limited Sharing: Use this to configure settings for limited sharing. See How to Perform Limited Share in EVCM for details.
-
Password: Set a password to protect the media. Viewers must enter the password to access it. This field is optional.
-
How to Access It?: Choose how viewers discover the media:
- Select From Portal Library to show it in the Portal library.
- Select Mark as Featured to feature it on the Portal homepage.
-
When will it be available?: Define when the media is published:
- Available from: Date/time when the media becomes accessible.
- Expires after: Date/time when access ends. After expiry, you can restore access by republishing Media from the Expired tab in the Media Manager.
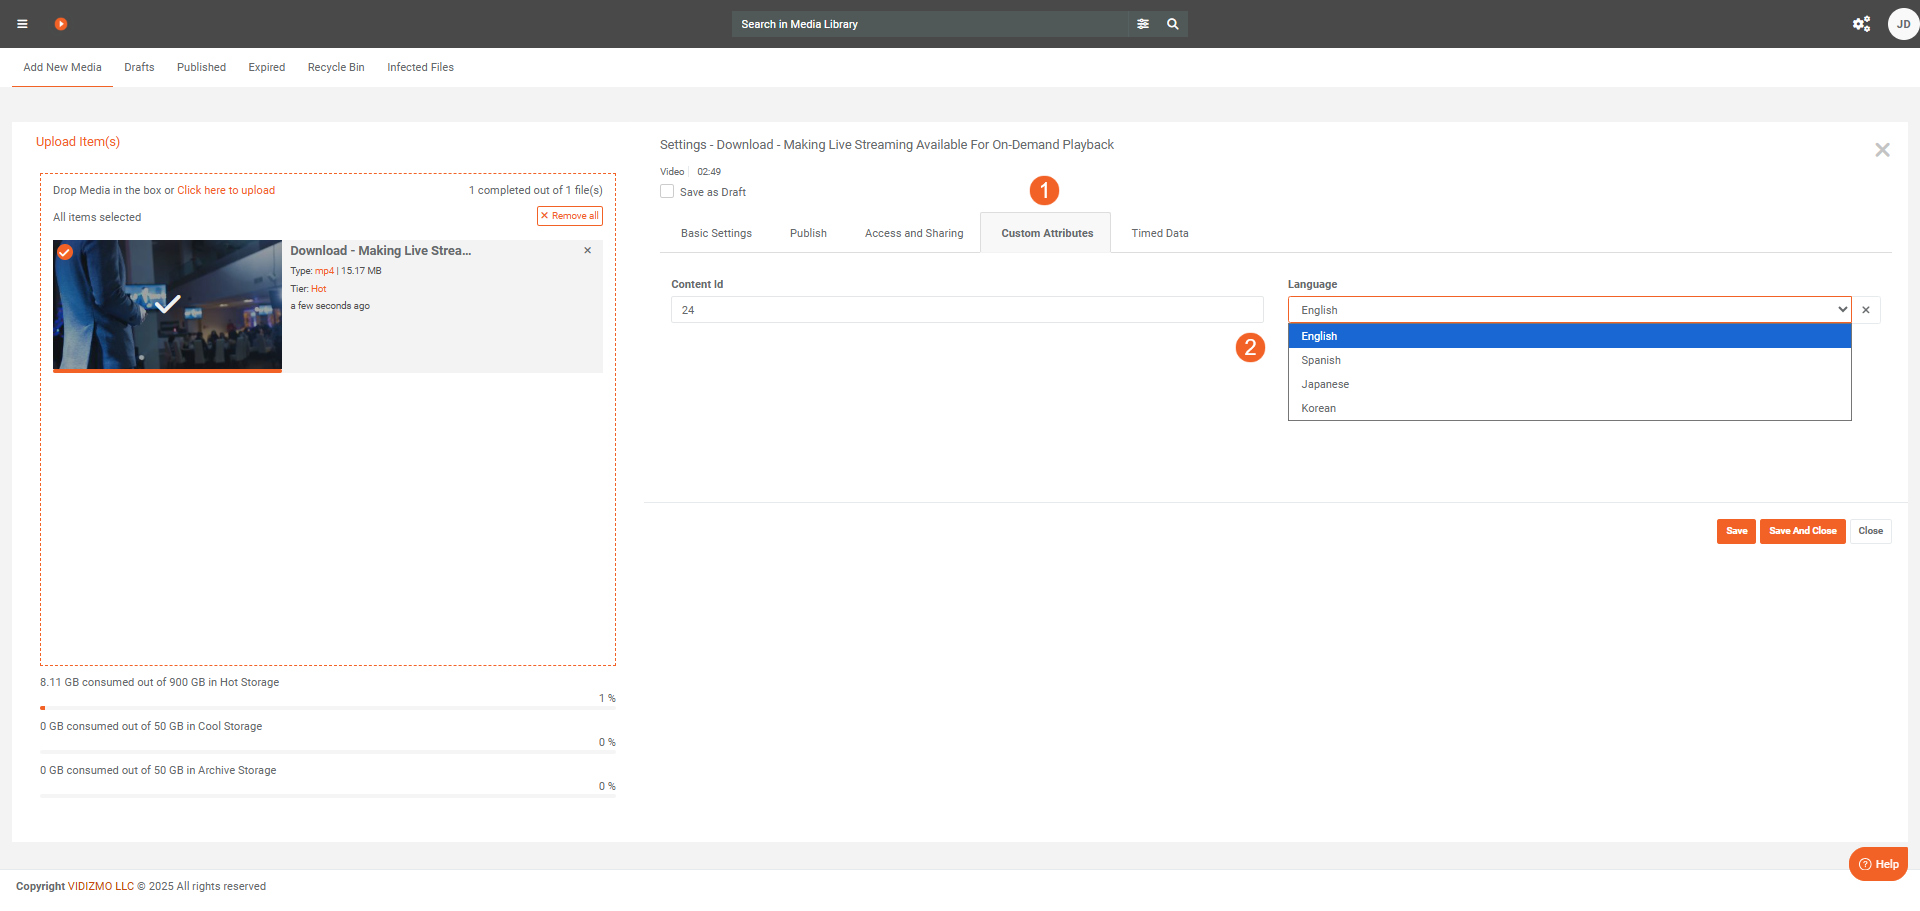
E. Custom attributes
Custom attributes add structured metadata that improves search and reporting. Users like Portal Managers can create and manage these attributes.
- The Custom attributes tab shows all attributes available for this media.
- Provide the values for the required custom attributes if they are any.
See How to Manage Custom Attributes for details.
F. Timed data
Use timed data to add captions or attach drone/geospatial telemetry that synchronizes with playback.
-
Timed Data Type: Choose the kind of timed data to upload: 1. Transcription/CC — Upload caption or transcript files to display closed captions during playback. Use Select Language to label the file's language. Available for audio and video only. You can upload multiple caption files (one per language). 2. Drone and Geospatial — Upload a KLV file to show a synchronized geospatial map and telemetry on the playback page. Available when the Geospatial feature (mostly available in DEMS) is enabled. See How to Analyze Geospatial Data in VIDIZMO for more.
-
Timed Data File: Select Choose file and upload the file for the selected timed data type.
Note: When multiple caption files are uploaded, viewers can select their preferred language during playback.

Finish and verify
After you finish uploading and configuring the settings, follow these steps to view the media.
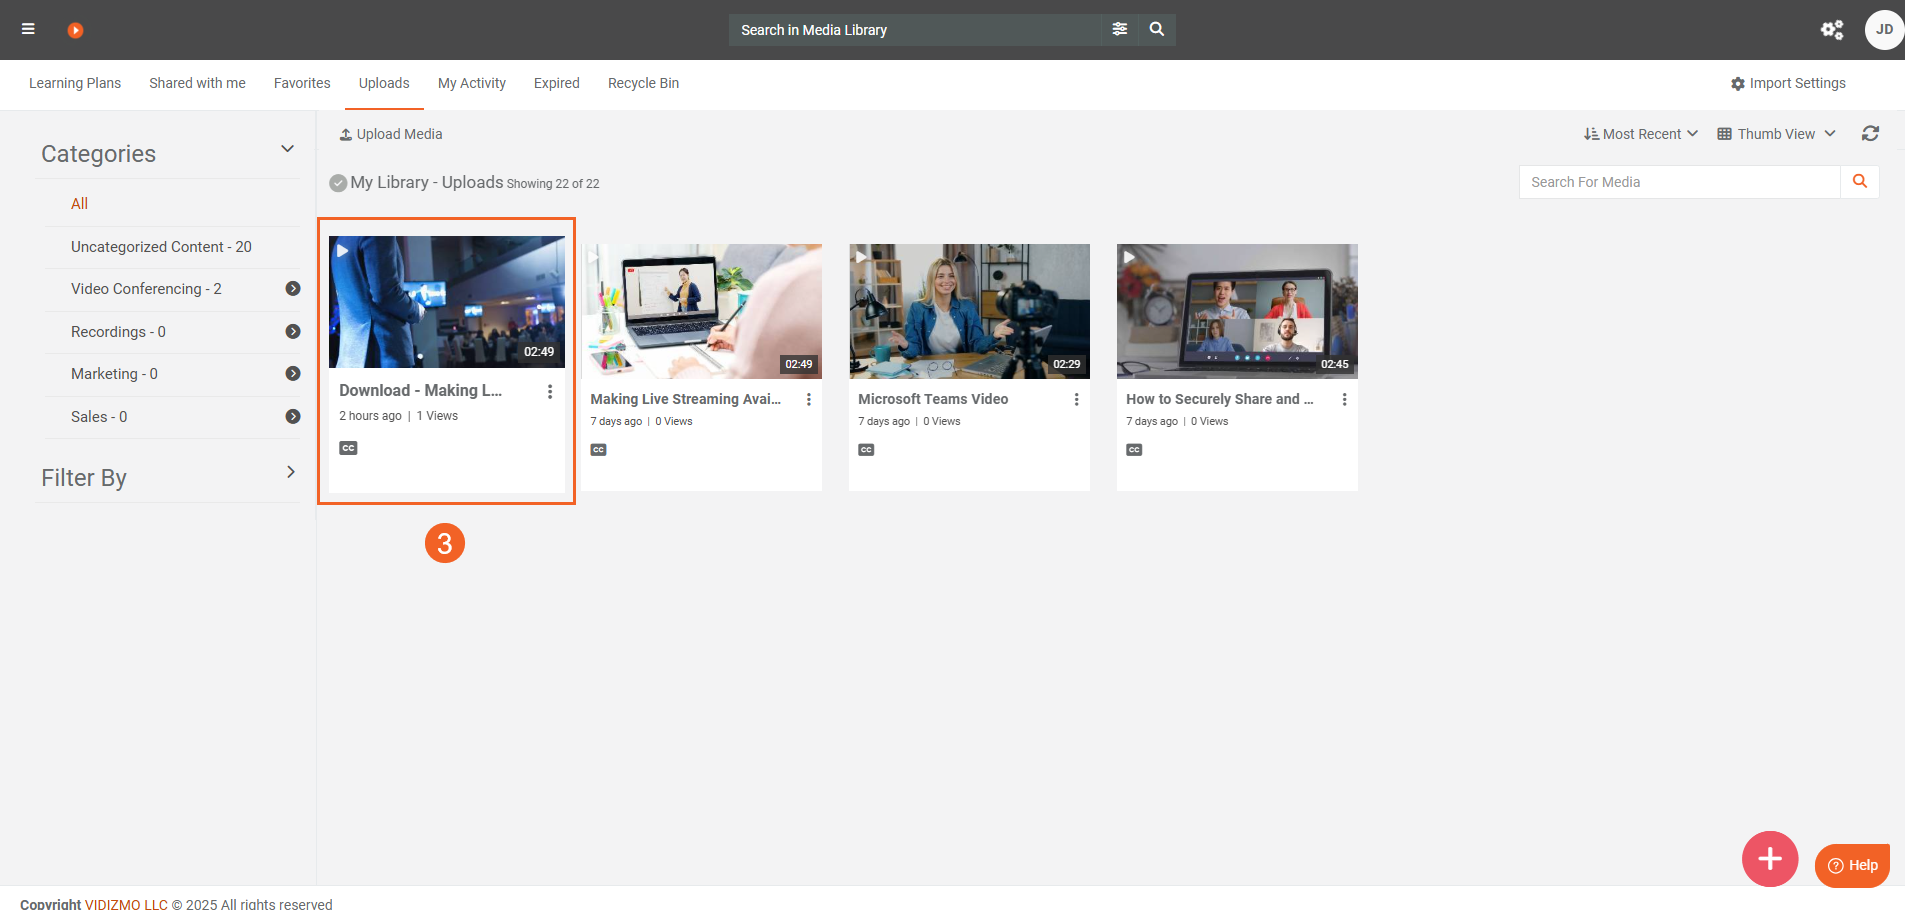
- Open the Portal library (select the search icon with no terms) to see your latest upload at the top. You can also check My library to see your uploads. For more information, visit Steps to Access My Library.
- The new upload is in a processing state as a workflow for it is initiated. To check the workflow status, click the workflow icon in the upper-right corner.
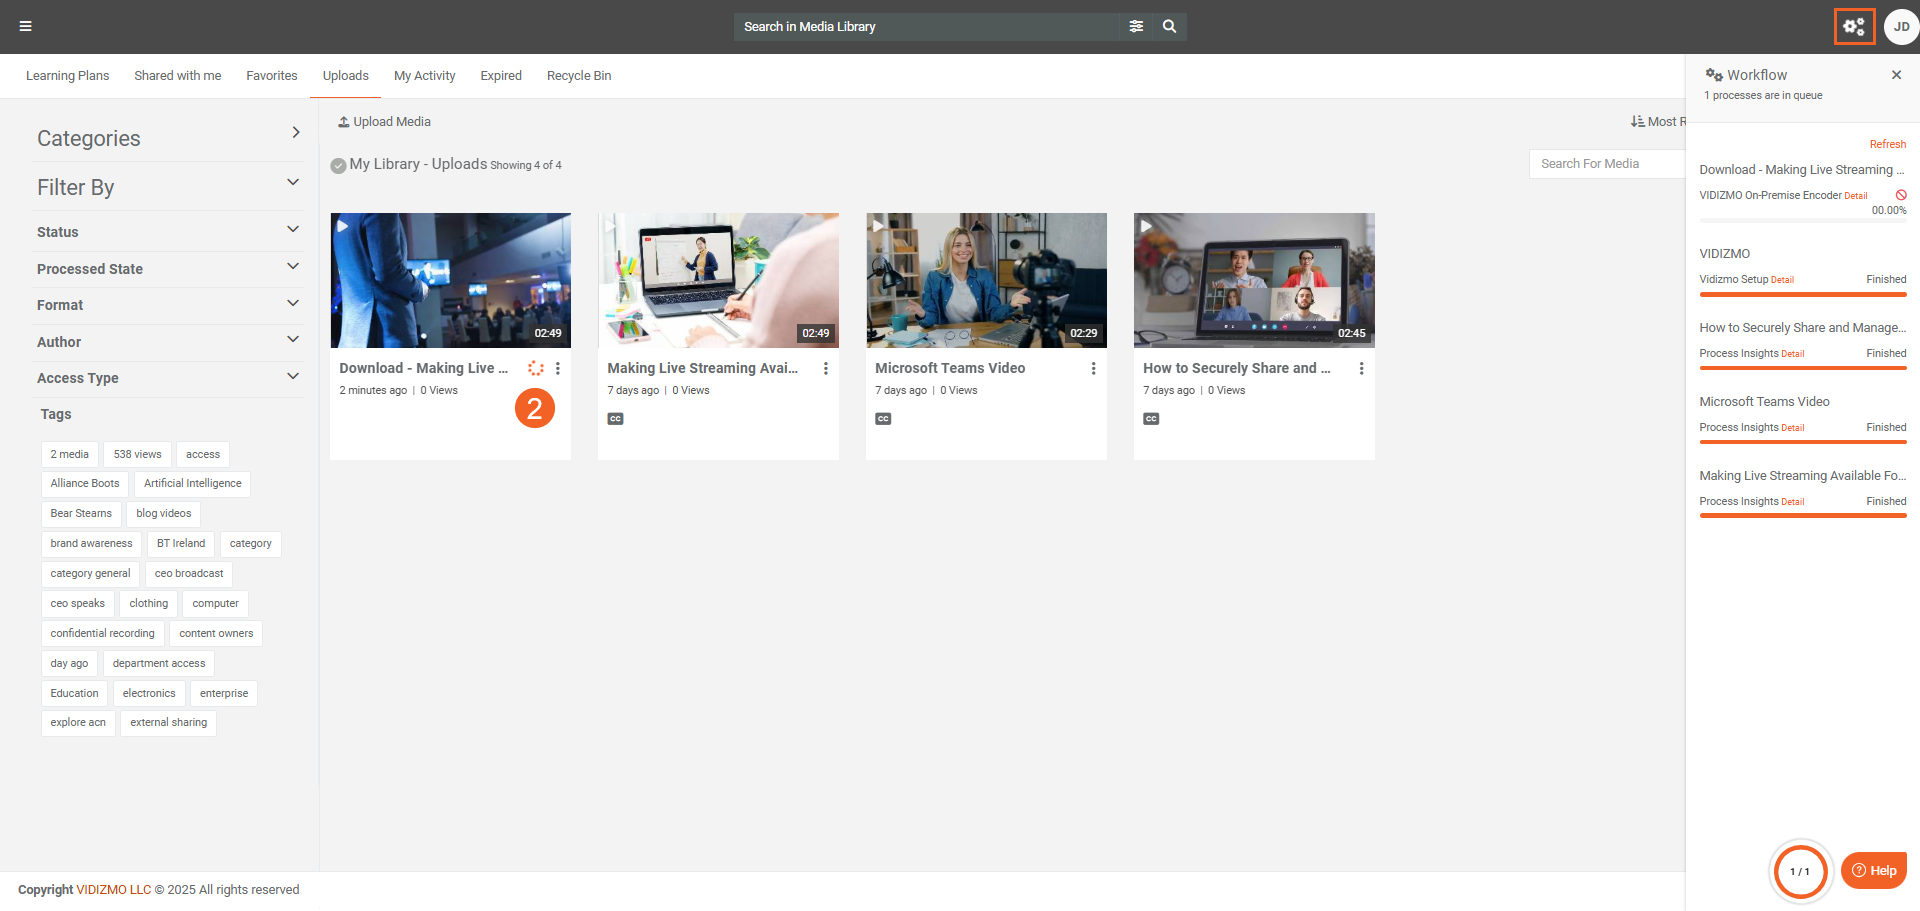
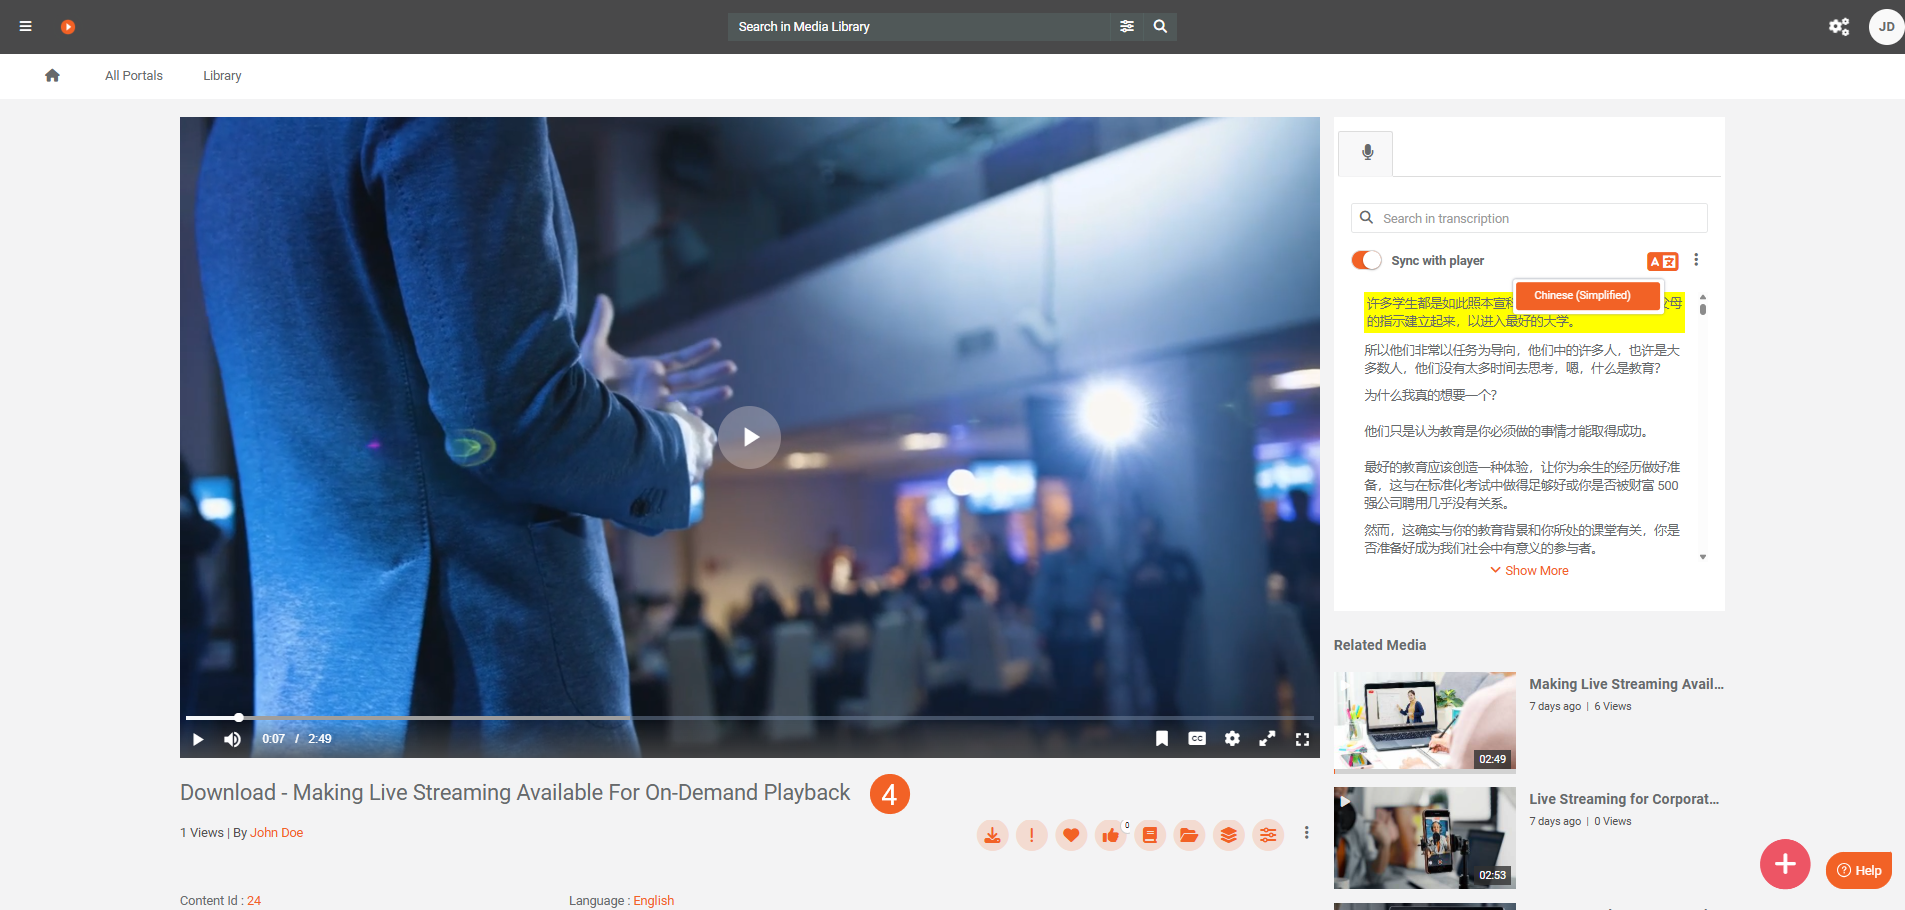
- When processing finishes, open the media to view its playback page.
- The playback page shows options such as Share, Download, Embed, Related videos, and Insights (what you see depends on Portal settings). It also shows the title and description you configured. To learn more about playback, see Understanding Playback Page.
Troubleshooting
-
Upload resumes after an interruption: If the browser refreshes or the network drops, and you don't see the upload on the settings page, upload the same file again. The upload resumes from the last completed chunk. You'll see a confirmation message.
-
Media won't play or its stuck in processing: Playback may be unavailable until transcoding finishes, especially for unsupported source formats. Check that the workflow is completed and that transcoding is enabled.
-
Captions or insights don't appear: Make sure Display all insights is selected. Confirm the workflow includes the activities needed to generate those insights; reprocess if necessary.
-
360° video doesn’t pan: Turn on Enable 360° in the Publish tab and confirm the source was recorded in 360°.
-
Viewers can't access the media: Review Access and sharing: verify Audience, Availability, and whether the item is published in the Portal library (and Featured media, if needed). For limited shares, confirm the intended users/groups are added.
-
Blocked by mandatory fields: If you can't continue after the upload finishes, check for required fields (for example, required custom attributes) set by the Portal admin.
-
Category selection missing: The category picker appears only if categories exist. Ask an administrative user (like a Portal Manager or Content Manager) to create categories in the Portal, then try again.
-
Can't create tags during upload: Creating new tags during upload is a portal-level setting. A Portal Manager can turn this option on or off. If you need to create new tags, contact your Portal Manager.